Tuesday, December 27, 2011

Maple Bacon Grilled Cheese

It is foods like this that I really need to stay away from, because after finding
a picture of this elsewhere on the internet, I knew that it was something that I had to try.
But now, I want to eat it all the time... not good for my thighs.

So I caution you as you read forward, do not fall victim to this delicious sandwich,
you can resist eating it every day... you have self control!

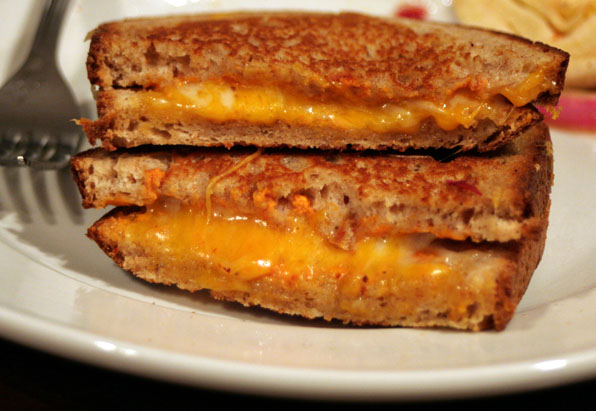
This is the Grilled Cheese Sandwich with Turkey Bacon, Maple Syrup, and Apple Butter:


Ingredients:
1 Slice of Turkey Bacon
2 Slices of French Bread (substitute and bread that tickles your fancy)
2 Slices of cheese singles. I chose kraft.
1 Dollop of Apple Butter
A splash of maple syrup

All you need to do is get out a large frying pan, heat it up to medium and start frying your bacon.
This is going to give you a little bit of grease and flavor on the pan for your bread.. yum.

Use cooking spray or butter to grease the other half of your pan as well as one side of each of your slices of bread.
Once this is done, just place the buttered sides down on the pan and toast those babies. You can also add
your cheese slices now, one on each piece of bread.

Now construct your sandwich!
Smoosh those two slices of bread together in the pan, and cook until both of the sides are toasted to your liking...

Now to plate: Go ahead and slide your sandwich onto a plate, put your cooked bacon slice on top, and garnish with our two dipping sauces :)
How gourmet, right?

At first I was kinda grossed out by the idea, but I was bored, hungry, and curious enough to try it, as I am hoping you are too.
But it is DELICIOUS!!!! You just have to try it. GOOD LUCK!

Thursday, December 8, 2011

Tell Me About Calamari.

As I was surfing the interwebz this afternoon, calamari came to my mind... on two separate occasions. 
First when I was on Tumblr and saw a picture of fried calamari with marinara,
and second when I saw something on my blog roll that looked a lot like calamari steak but wasn't.
I got squid on the mind!

So my question is, how difficult would it be for me to attain some good quality calamari
and to cook it in a delicious way? I live in Midwestern College Town, USA so there aren't
any local fish markets that I can swing by... so I am limited to the super market.
My personal preference is Kroger, but Jewel might be the better contender.
I would definitely have a better chance of finding some when I go home for Christmas Break.

I would like to use calamari steaks like this:


The best tasting squid steak I have ever had was at Kiku Japanese Steakhouse, just plain hibachi style.
I can only tell that they pre flour the steaks, and then cook them in oil and butter with salt and pepper.
So I'm assuming the amazing flavor comes from the type of oil they use.


I can't find any pictures of what it actually looks like after it is cooked, so I'll have to go sometime soon to take some photos :)

Do you guys know of any good recipes or other ways to cook calamari?


Monday, October 24, 2011

Fall Foods

Hey guys,  long time no see.
as of lately I have been making the transition to fall foods and really acquiring the richer winter palate that
everyone develops this time of year.
It's all about big comfy knit sweaters, my favorite socks, cheese, butternut squash, tomato, pumpkin, pork, and allspice.

There are several recipes that I have been contemplating lately such as:
Macaroni and Grilled Cheese
Tomato Soup... (I have never liked it, but really want to)
Pumpkin Bread *note* I am a horrible and destructive baker.
Pork Chops
Pulled Pork
Beef Stew
etc.

Please if you have any suggestions for recipes that you particularly enjoy, leave a link or comment.
I would love to try it out and post about it!

In the meantime take a look at these recipes I found appealing:

Brandied Cranberry Short-Rib Stew
via MyRecipes.com

Pork Vindaloo
via MyRecipes.com

Spiced Lamb Chops with Rosemary
via MyRecipes.com

Tomato Soup Grilled Cheese
via PithyandCleaver.com


Sunday, September 25, 2011

The New Eggs, Cheese, and Toast

ALLELUIAAAA!!! I have found a little piece of heaven.
Meet Texas Toast with Havarti, Egg, and Truffle Oil.

This meal was inspired by Ino Cafe of New York featured on The Best Thing I Ever Ate
  

Ingredients
1 slice of texas toast
1 separated egg yolk
1 slice of havarti cheese
3 asparagus spears
olive oil
salt + pepper


First things first, pre-heat your oven to 425.

To prepare your toast, cut the crust off and slice a 1 inch square in the middle.
DO NOT CUT ALL THE WAY THROUGH!

You are going to use this 'box' as a cup for your egg yolk later, so compress the square down with the
back of your knife or your finger... whatever :)

Once your oven is finished pre-heating, pop the toast in on a cookie sheet for about 3 to 5 minutes so
that it is starting to brown on the edges.

All the while...
You are going to want to get your asparagus, cut it into bite size pieces and heat them in a pan
with a little bit of olive oil, salt, and pepper. If you like your asparagus crunchy like I do, then this
should really only take about 3 minutes. Once they are done just scatter them on the plate, kinda like a garnish.

Once the toast is out, go ahead and pour the yolk into your box and put your cheese around the edges.
When you put the toast back into the oven it wont be for a specific amount of time... all you need to do is watch the cheese. 
Once the cheese is ooey and gooey and dripping over the edges, you can take the toast out. The yolk should be runny.


To finish: Plate your toast, add your salt, pepper, and drizzle the truffle oil. Voila! Eat in four steps:
1. Admire the look
2. Make a mess
3. Soak up every last bit of yolk
4. Be sad it is over

Enjoy!

Thursday, September 22, 2011

Artichoke

How amazing is it that I actually followed through with one of my goals? Artichokes!
Seeing that the only forms of artichoke I have ever eaten is smothered in
cheese or in pasta, I figured to really get to know the vegetable,
I needed it in a very simplified form. Broiled.

The preparation and cooking are just as simple as the flavor...


Ingredients:
1 Artichoke
1/2 of a lemon
2 garlic cloves
1 Tablespoon of Olive oil
Salt + Pepper


(Preheat the oven to 425)
All you need to do to prepare the artichoke is cut off the stem, and the top inch or so of the leaves...
they aren't edible. Once you have that done, you can start spreading the leaves apart 
so that all of the flavors of the juices you add later can drip down into the crevices...

Before you start adding the seasonings, put the artichoke on a piece of tin foil 
with a tiny bit of olive oil to make sure it doesn't stick at all.

Squeeze your lemon over the artichoke, making sure it is evenly distributed
Next, drizzle your olive oil over the entire artichoke, adding more depending on your personal taste.
Now, shove the two garlic cloves into the leaves...
and sprinkle with salt and pepper.

Wrap your artichoke up in the tinfoil making sure nothing is exposed!

And pop it in the oven.

Now comes the hard part... waiting. 1 1/2 hours. For an artichoke.
(My artichoke was fairly large, so for a medium I would only do 1 hour and 15 minutes or so...)


The finished product...


How to eat: Pull the leaves out one by one and scrape the meatiness off of the bottom with your teeth.
It may take some trial and error to figure out what is and is not edible.

Or you could always dive in face first and see how it goes.


** You may want some sauce to dip it in... what kind, is up to you. Be creative! && Enjoy :)

Wednesday, August 31, 2011

Rum Raisin

Is it so strange that I want to eat this candle?

This is a Woodwick Candle, and I highly suggest you all give one of these a try.
They are appropriately names because of their wooden wick, which crackles as it burns...
Kind of like Rice Crispies, but better.

This flavor is Rum Raisin, and it reminds me of the delicious smell that fills a warm kitchen while raisin bread, or bread pudding is baking in the oven. Very fall.

Oh, it also reminds me of the fact that I can't bake for shit.

Any good recipes for raisin bread or something of the sort for the baking handicapped?

Saturday, August 20, 2011

Turkey Meatballs w/ Truffle Risotto

Hey guys, this meal was the first official dinner I cooked for the school year. Although school doesn't start until Monday I am all moved in and excited to start cooking more for myself.

So here we have Turkey Meatballs with Risotto and Truffle Oil. It was super delicious! Again, another successful recipe!! I'm on a roll...


Ingredients:
1 lb of Ground Turkey Meat (only use half if you're not cooking for 4 people)
1 Cup of Risotto
2 Cloves of garlic
Salt, Pepper, and Italian Seasoning to taste
1 Egg
1/4 cup Parmesan Cheese
1/4 cup of Romano Cheese
Handful of Spinach
Butter
Olive Oil
1 Cup of Boiling Stock (chicken or veggie)
Truffle Oil to top


First, place the ground turkey into a large bowl. 
Add 1 clove of minced garlic, salt, pepper, and italian seasoning to taste. 
Then add the parmesan cheese, and a pinch of the romano if you'd like.

Mix the ingredients together with your hands just so that everything is evenly dispersed.
Now you are going to add your egg to act as the glue that holds this all together.

As you are doing this, you can heat your pan adding enough olive oil so that every 
meatball is able to sit in it. And you can start warming your stock in another pot.

Once the oil is hot enough (becomes a little less viscous) you can add your meatballs, 
be careful not to let them touch or they will cook together.
I'd say about 8 to 10 minutes on each side, and then waiting until browned.

Now that your meatballs are cooking, you can start on the risotto.

Heat a pan wide enough that the risotto lays flat and does not pile up at all. 
Add your butter first and then add your olive oil in equal parts so that they completely cover the pan.

Add your second clove of minced garlic and let it simmer for a little until you add your risotto.
You want to let the risotto cook in the oil and butter until it all becomes see through except for the ends.

Once it is see through, you can add one ladle of your boiling stock, stirring until the risotto soaks up all 
of the moisture... you are going to repeat this until your stock is gone.

Ladle, stir, soak, ladle, stir, soak... once all of your stock is gone, take a little taste test to see if the risotto is soft or to your liking.
By now, the meatballs are definitely done cooking and can be turned off if they are at nice golden brown.

Now, you add your spinach and romano cheese to the risotto, stirring until it is completely melted.
Plate your risotto, drizzle with about a tablespoon of truffle oil, and top with meatballs. & Serve!
I know you will be deeply satisfied with this meal, it is surprisingly filling but not heavy enough that you feel like you just ate two big macs.

Enjoy, my fellow foodies.

Monday, August 8, 2011

Cannellini Bean Soup with Arugula Salad

Hello my dears, tonight I cooked for my Mom and Sister, a recipe out of
a new Italian cooking book I found for four dollars at TJ Maxx :)

It is a Cannellini Bean Soup (vegetarian, for my sister) with a delicious Arugula salad.
At first I was sad that I couldn't use chicken stock instead of vegetable,
but it turned out tasting delicious anyway.


Ingredients for the soup:
1 can of cannellini beans, drained
*the recipe called for dried beans that be soaked overnight... yeah right.
7 cups of chicken or vegetable stock
4oz of corallini pasta, or any soup pasta for that matter.
*I used more than called for because I didn't want too much broth left over in the end.
6 tbsp. of olive oil
2 garlic cloves, chopped finely
4 tbsp. of chopped parsley
salt and pepper

*I used one bay leaf and shaved romano cheese as well


Ingredients for the salad:
Arugula lettuce
tomato
shaved romano cheese
Olive oil
lemon juice
balsamic vinegar
finely chopped garlic
chopped basil
(any other spices you would want, I used salad supreme)
salt and pepper


Directions:
Add the beans and stock to a pot with a thick bottom and bring to a boil.
Once the beans are heated and softened, take about half of the beans and a little stock
and put them into a food processor/ blender and create a smooth puree.
Add the puree back to the soup and stir well.

Bring the soup back to a boil, and add the pasta, stirring so that it does not stick.
Cook for 8 to 10 minutes. While cooking the pasta, heat 2 tablespoons of olive oil
in a small pan with the chopped garlic, only cooking for 30 seconds or so. Do not burn!!!

Add the garlic to the soup, along with the parsley, salt, and pepper.
You can now serve your soup with shaved romano cheese on top, yummm


Unlike my recent pizza mishap, this soup and salad dinner, WAS DELICIOUS.
I would recommend this recipe to anyone and everyone. It was plenty filling because 
of the thickness and the amount of pasta. Definitely something I would have enjoyed 
when I was little too...

It didn't take long at all with the canned beans apposed to the raw ones, and I'd like to think that
it was fairly healthy for you... no huge sources of fat, except for the olive oil, but thats whatever ;)

Oh and this random photo on the bottom is my new truffle infused olive oil! I had to get this little
bottle for a number of reasons; One, I have never really tried truffle oil before, except at a restaurant
on top of popcorn chicken and popcorn with white cheddar. So it was pretty masked.
The other reason being that the larger bottle of pure truffle oil (not that much larger) was
3 times the price... yeah not for me in this point of my life :)

It says on the bottle that this oil is especially good on risotto... I smell a new recipe coming...

Hope you enjoy the food! 


Sunday, August 7, 2011

Spinach, Mozzarella, and Prosciutto Pizza


 Connor and I decided to use the box of Jiffy Pizza Crust mix, and I still don't have flour in my apartment, so I couldn't make it correctly... woops

 Fresh Garlic


*Tip: Don't add canned tomatoes... they were honestly disgusting and ruined the whole pizza.

All in all, this pizza could have been much better with higher quality ingredients, but good enough to post. I hope you enjoyed the photos anyway :)

Monday, August 1, 2011

Cajun Fish Tacos

Hello again, this weekend Connor and I had a taste for a light fish dinner. Although it is known to be
dangerous going grocery shopping on an empty stomach, we went. And without a concrete recipe in mind.

Btw, I didn't win the challenge... I ended up buying some impulse candied kiwi slices.

So, after roaming the isles of Kroger, this is what we ended up with: Cajun Fish Tacos.


Ingredients:

2 White fish filets (found in frozen section) with cajun seasoning
1/2 of an Avocado
1/2 Cup of chopped cilantro
1/2 Cup of chopped white onion
1 Cup of halved cherry tomatos
1/2 of a lime for squeezing
Mexican cheese to taste
Flour, corn, or hard corn tortillas


This dinner was so satisfying and delicious, it was sinful. Of course, half of the credit absolutely goes
to Kroger for carrying that delicious, pre-seasoned, frozen fish. But the rest was all fresh ingredients that were amazing together.

Plus, each filet was only around 150 calories, so this was almost a guiltless dinner... as for the cheese... I don't know.


About these photos... I didn't know taco shells burnt so easily in the microwave.


Thanks for reading :)
& I hope you get to enjoy the tacos, too!